
Last November my husband and I spent the week of Thanksgiving in Tokyo.
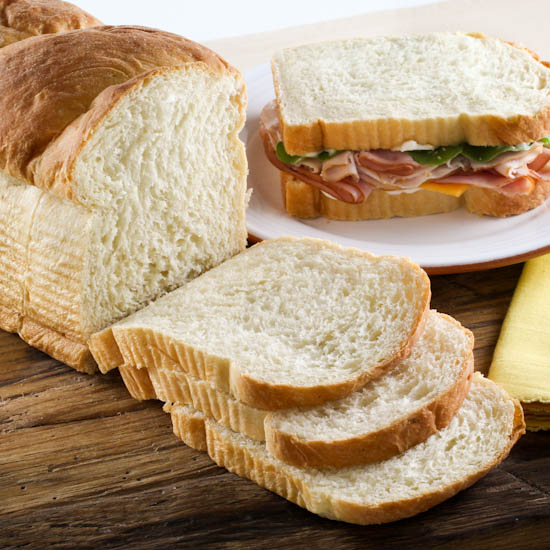
The first few days we were there Mr. Shenanigans had to work, so I took the opportunity to visit different neighborhoods in Tokyo, tasting different foods and soaking up the culture. Once his work obligations were complete we moved into a little apartment in the quietly hip neighborhood of Shimokitawaza. First thing I did after we dropped our bags was head over to the neighborhood market to buy food to cook in our postage stamp kitchen. Nothing fancy, just breakfast foods as we ate lunch and dinner out while sight-seeing. I got eggs with bright orange yolks, tiny little sausages that tasted oddly like hot dogs, butter, and a loaf of very VERY fluffy thick-cut white bread. That bread was life changing. It is unlike any bread I have had in America – soft yet stretchy with a slightly sweet taste. I would toast it in a buttered skillet for breakfast, and I knew when we left Tokyo at the end of our trip I would miss the bread more than anything.

So, I decided I would find a recipe and make this magic bread at home. After much research I discovered a few universal truths about Japanese (or Hokkaido) Milk Bread. First, it is typically made with a water or water/milk roux called a tanzhong. This roux super hydrates a small portion of the flour which makes the finished loaf more moist, springy, and helps keep it fresh for days. Second, there is a fairly high ratio of wet ingredients – heavy cream, milk, water, eggs, and melted butter. The high level of hydration, and the high fat content of the cream, egg yolk, and butter, means the crumb of the bread is fine and tender. So, with this knowledge I set to work, and after three months of experiments I have created a recipe that is about as close as my American home kitchen can come to the commercially prepared bread I had in Japan. This bread is tender, moist, and perfect for sandwiches, toast, or just eating as is. It keeps, sealed in a plastic bag, for nearly a week! It makes a large loaf, so unless you have a 13-inch bread pan you may need to make two smaller loafs. I used a pullman pan without the lid and it is ideal.
- For the tanzhong:
- ⅓ cup heavy cream
- ⅓ cup water
- ⅓ cup bread flour
- For the bread:
- ½ cup heavy cream
- ⅓ cup water
- 1 tablespoon active dry yeast
- ⅓ cup sugar
- 1½ cups unbleached all-purpose flour
- 1½ cups unbleached bread flour
- 1 tablespoon dry milk powder
- 1 tablespoon vital wheat gluten
- 1½ teaspoons kosher salt
- 1 egg
- 4 tablespoons butter, melted and cooled
- Begin by making the tanzhong.

- In a medium saucepan combine the cream, water, and bread flour. Whisk until smooth then cook over medium heat until the mixture becomes very thick, about 5-7minutes. The mixture should reach 150 F. Set aside to cool.
- Now, prepare the bread dough.
- Combine the heavy cream and water and heat until it reaches 105 F. Add the yeast and 1 teaspoon of the sugar and allow to stand for 10 minutes, or until the mixture is foamy and bubbling.
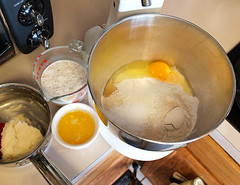
- In the work bowl of a stand mixer combine the remaining sugar, flours, milk powder, gluten, salt, egg, and butter along with the yeast mixture and the cooled tanzhong. Using the dough hook mix the dough on low speed for 3 minutes, or until the ingredients are just combined, then increase the speed to medium and mix for 8 minutes. The dough may seem sticky and loose, but this is ok.
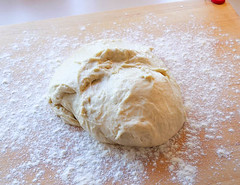
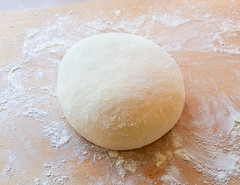
- Turn the dough out onto a work surface dusted with flour. Gently knead the dough, adding additional flour to keep it from sticking, for 3 minutes then form the dough into a smooth ball and place into a lightly greased bowl. Cover with a damp kitchen towel or plastic wrap and allow to rise until double in bulk, about 1½ hours.
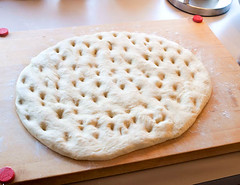
- Once risen turn the dough out onto a lightly floured surface and use your palm to press the dough flat. Once flat use your finger tips to poke holes in the dough to make sure it is thoroughly degassed. You do not want any large gas bubbles to remain.
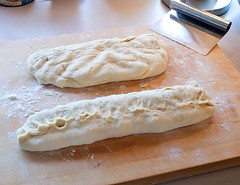
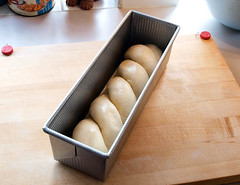

- Divide the dough into two equal pieces. Form each piece into a log that is three inches longer than your pan. Twist the logs together to form a loaf and transfer to a lightly greased loaf pan. Cover with plastic or a damp kitchen towel and allow to proof until the dough reaches the top of the pan, about 45 minutes.
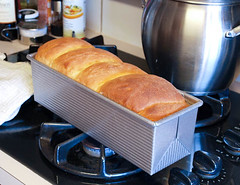
- Heat the oven to 350 F. Bake the bread for 25 - 35 minutes, or until the bread is deeply golden brown and it sounds hollow when thumped on the side. Cool in the pan for 10 minutes before turning out onto a rack to cool to room temperature. Cool completely before slicing.


